AI
LLM으로 챗봇 만들어보기
qkrwnsmir
2024. 10. 15. 10:41
Ollama
Ollama 설치
1. 다운로드 클릭

2. 운영체제에 맞춰 다운로드

3. 설치 후 터미널에서 설치 확인 후, 모델 실행
설치확인
ollama serve
웹브라우저에서 127.0.0.1:11434 접속해서 Ollama is running 나오면 실행중임.
ollama list
ollama run llama3.2

Ollama 사용
import requests
import json

# Define the URL and the payload
url = 'http://localhost:11434/api/generate'
data =input('질문: ')
payload = {
    "model": "llama3.2",
    "prompt": data
}

# Convert the payload to a JSON string
data = json.dumps(payload)

# Make the POST request
response = requests.post(url, data=data, headers={'Content-Type': 'application/json'})

if response.status_code == 200:
    list_dict_words = []
    for each_word in response.text.split("\n"):
        try:
            data = json.loads(each_word)
        except:
            pass
        list_dict_words.append(data)

llama_response = " ".join([word['response'] for word in list_dict_words if type(word) == type({})])
print(llama_response)
Ollama 학습
Packages 설치
%%capture
# 셀의 출력을 숨겨준다.

!pip install "unsloth[colab-new] @ git+https://github.com/unslothai/unsloth.git"
# unsloth 라이브러리 설치
# llama 모델의 fine-tuning을 더 쉽고 효율적으로 만들어준다.
# [colab-new] colab환경에 맞은 버전을 설치하도록 지정

from torch import __version__
from packaging.version import Version as V

xformers="xformers==0.0.27" if V(__version__) < V("2.4.0") else "xformers"
!pip install --no-deps {xformers} trl peft accelerate bitsandbytes triton
# fine-tuning에 필요한 추가 라이브러리 설치
# --no-deps 옵션은 이 라이브러리들의 종속성을 설치하지 않도록 함
# xformers : 트랜스포머 모델의 성능을 향상시키는 라이브러리
# trl : 강화학습을 이용한 언어 모델 훈련을 위한 라이브러리
# peft : 매개변수 효율적 미세조정을 위한 라이브러리
# accelerate : 딥러닝 모델의 훈련을 가속화하는 라이브러리
# bitsandbytes : 모델 양자화를 위한 라이브러리
# triton : NVIDIA에서 개발한 고성능 머신 러닝 모델 서빙을 위한 오픈소스 소프트웨어 라이브러리
from unsloth import FastLanguageModel
import torch

max_seq_length = 2048
# 모델이 처리할수 있는 최대 시퀀스 길이를 설정
# RoPE(Rotary Position Embedding) 스케일링을 자동으로 지원하므로 원하는 값으로 설정 가능

dtype = None
# 모델의 데이터 타입을 설정, None으로 두면 자동 감지
# Tesla T4,V100 GPU의 경우 Float16, Ampere 이상의 GPU에서는 Bfloat16을 사용
# bfloat16은 더 넓은 표현 범위 덕분에 딥러닝에 적합
# float16은 정밀도는 높지만 표현 범위가 제한적이라 오버플로우가 발생하기 쉬움
# 특성	    float16	            bfloat16
# 부호 비트	1비트	            1비트
# 지수 비트	5비트	            8비트
# 가수 비트	10비트	            7비트
# 표현 범위	제한적	            float32와 동일한 넓은 범위
# 정밀도	더 높음	            상대적으로 낮음
# 사용 사례	그래픽, 이미지 처리	딥러닝 훈련, AI 추론

load_in_4bit = True
# 4비트 양자화를 사용할지 설정, 메모리 사용량을 줄이는 데 도움
# True로 설정하면 4비트 양자화를 사용하고, False로 설정하면 사용하지 않음.

# 미리 4비트로 양자화된 모델들의 목록
# 이 모델들은 다운로드가 4배 빠르고 메모리 부족 문제(OOM)를 방지할수 있음.
# 더 많은 모델은 https://huggingface.co/unsloth 에서 확인할수 있음.
fourbit_models = [
    "unsloth/Meta-Llama-3.1-8B-bnb-4bit",      # Llama-3.1 15 trillion tokens model 2x faster!
    "unsloth/Meta-Llama-3.1-8B-Instruct-bnb-4bit",
    "unsloth/Meta-Llama-3.1-70B-bnb-4bit",
    "unsloth/Meta-Llama-3.1-405B-bnb-4bit",    # We also uploaded 4bit for 405b!
    "unsloth/Mistral-Nemo-Base-2407-bnb-4bit", # New Mistral 12b 2x faster!
    "unsloth/Mistral-Nemo-Instruct-2407-bnb-4bit",
    "unsloth/mistral-7b-v0.3-bnb-4bit",        # Mistral v3 2x faster!
    "unsloth/mistral-7b-instruct-v0.3-bnb-4bit",
    "unsloth/Phi-3-mini-4k-instruct",          # Phi-3 2x faster!d
    "unsloth/Phi-3-medium-4k-instruct",
    "unsloth/gemma-2-9b-bnb-4bit",
    "unsloth/gemma-2-27b-bnb-4bit",            # Gemma 2x faster!
]

# FastLanguageModel을 사용하여 사전 훈련된 모델과 토크나이저를 로드
# 게이트된 모델(예: meta-llama/Llama-2-7b-hf)을 사용할 경우 토큰 필요
model, tokenizer = FastLanguageModel.from_pretrained(
    model_name = "unsloth/Meta-Llama-3.1-8B",
    max_seq_length = max_seq_length,
    dtype = dtype,
    load_in_4bit = load_in_4bit, # 4비트 양자화 사용 여부
)
LoRA는 대규모 언어 모델을 적은 수의 매개변수만으로 효과적으로 fine-tuning할 수 있게 해주는 기능
model = FastLanguageModel.get_peft_model(
    model,
    r = 16,
    # LoRA 랭크, 0보다 큰값이어야 함. 추천값 : 8, 16, 32, 64, 128
    # 값이 클수록 더 많은 매개변수를 학습하지만, 메모리 사용량도 증가
    target_modules = ["q_proj", "k_proj", "v_proj", "o_proj",
                      "gate_proj", "up_proj", "down_proj",],
    # LoRA를 적용할 모듈들, 이는 모델의 주요 변환 레이어임.
    lora_alpha = 16,  # LoRA 스케일링 factor, 일반적으로 r과 같은 값을 사용
    lora_dropout = 0, # LoRA 레이어의 드롭아웃 비율, 0으로 설정하면 최적화함.
    bias = "none",    # 바이어스 학습 방식, none으로 설정하면 최적화됨.
    # 그래디언트 체크포인팅 사용 여부, "unsloth"는 VRAM을 30% 덜 사용하고 배치 크기를 2배로 늘릴 수 있음.
    # 매우 긴 텍스트에 대해 True or "unsloth" 사용
    use_gradient_checkpointing = "unsloth",
    random_state = 3407, # 난수 생성을 위한 시드값
    use_rslora = False,  # 랭크 안정화 LoRA 사용여부
    loftq_config = None, # LoftQ 설정, 현재는 사용하지 않음.
)
Dataset 준비하기
Hugging Face Data set : jojo0217/korean_safe_conversation
alpaca_prompt = """Below is an instruction that describes a task, paired with an input that provides further context.
Write a response that appropriately completes the request.

### Instruction:
{}
### Input:
{}
### Response:
{}
"""
# Alpaca 형식의 프롬프트 템플릿을 정의
# 아래는 작업을 설명하는 지시사항과 추가 맥략을 제공하는 입력이 짝을 이루고 있습니다. 요청을 적절히 완료하는 응답을 작성하세요

EOS_TOKEN = tokenizer.eos_token
# 토크나이저의 EOS(End of Sequence) 토큰을 가져옴. 이는 생성된 텍스트의 끝을 표시하는데 사용됨
# 반드시 EOS_TOKEN을 추가해야 함.

# 데이터셋의 각 예제를 Alpace 형식으로 포매팅하는 함수를 정의
def formatting_prompts_func(examples):
    instructions = examples["instruction"]
    inputs       = examples["input"]
    outputs      = examples["output"]
    texts = []
    # 반드시 EOS_TOKEN을 추가해야 함, 그렇치 않으면 생성이 무한히 계속될 수 있다
    for instruction, input, output in zip(instructions, inputs, outputs):
        text = alpaca_prompt.format(instruction, input, output) + EOS_TOKEN
        texts.append(text)
    return { "text" : texts, }

# 여기서는 불필요 제거 가능
pass

# Hugging Face의 datasets 라이브러리에서 데이터셋을 로드
from datasets import load_dataset
dataset = load_dataset("jojo0217/korean_safe_conversation", split = "train")

# 데이터셋의 각 예제에 formatting_prompts_func를 적용합니다.
dataset = dataset.map(formatting_prompts_func, batched = True,)
모델 훈련시키기
from trl import SFTTrainer
from transformers import TrainingArguments
from unsloth import is_bfloat16_supported

# SFTTrainer를 설정, 이는 Supervised Fine-Tuning을 위한 트레이너
trainer = SFTTrainer(
    model = model,             # 앞서 설정한 PEFT모델
    tokenizer = tokenizer,     # 토크나이저
    train_dataset = dataset,   # 전처리된 데이터셋
    dataset_text_field = "text",  # 데이터셋에서 사용할 텍스트 필드 이름
    max_seq_length = max_seq_length, # 최대 시퀀스 길이
    dataset_num_proc = 2,            # 데이터 처리에 사용할 프로세스 수
    packing = False,                 # 짧은 시퀀스의 경우 True로 설정하면 훈련 속도를 5배까지 높일수 있음
    args = TrainingArguments(
        per_device_train_batch_size = 2,  # GPU당 배치 크기
        gradient_accumulation_steps = 4,  # 그래디언트 누적 단계
        warmup_steps = 5,                 # 학습률 웜업 단계 수
        # num_train_epochs = 1, # 전체 데이터셋에 대한 훈련 횟수
        max_steps = 60,         # 최대 훈련 단계 수
        learning_rate = 2e-4,   # 학습률
        fp16 = not is_bfloat16_supported(), # bfloat16이 지원되지 않을 경우 fp16 사용
        bf16 = is_bfloat16_supported(),     # bfloat16 지원 여부에 따라 사용
        logging_steps = 1,                  # 로그 출력 주기
        optim = "adamw_8bit",               # 최적화 알고리즘(8비트 AdamW)
        weight_decay = 0.01,                # 가중치 감쇠
        lr_scheduler_type = "linear",       # 선형 학습률 스케줄러
        seed = 3407,                        # 랜덤시드
        output_dir = "outputs",             # 출력 디렉토리
    ),
)
# 현재 메모리 상태 표시
#@title Show current memory stats
gpu_stats = torch.cuda.get_device_properties(0)
start_gpu_memory = round(torch.cuda.max_memory_reserved() / 1024 / 1024 / 1024, 3)
max_memory = round(gpu_stats.total_memory / 1024 / 1024 / 1024, 3)
print(f"GPU = {gpu_stats.name}. Max memory = {max_memory} GB.")
print(f"{start_gpu_memory} GB of memory reserved.")
trainer_stats = trainer.train()
# 훈련 후 훈련 시간, 메모리 사용, 메모리 사용 비율등 메모리 상태 표시
#@title Show final memory and time stats
used_memory = round(torch.cuda.max_memory_reserved() / 1024 / 1024 / 1024, 3)
used_memory_for_lora = round(used_memory - start_gpu_memory, 3)
used_percentage = round(used_memory         /max_memory*100, 3)
lora_percentage = round(used_memory_for_lora/max_memory*100, 3)
print(f"{trainer_stats.metrics['train_runtime']} seconds used for training.")
print(f"{round(trainer_stats.metrics['train_runtime']/60, 2)} minutes used for training.")
print(f"Peak reserved memory = {used_memory} GB.")
print(f"Peak reserved memory for training = {used_memory_for_lora} GB.")
print(f"Peak reserved memory % of max memory = {used_percentage} %.")
print(f"Peak reserved memory for training % of max memory = {lora_percentage} %.")
추론하기(Inference)
# alpaca_prompt = Copied from above
FastLanguageModel.for_inference(model) # Enable native 2x faster inference
inputs = tokenizer(
[
    alpaca_prompt.format(
        "당신은 지식이 풍부하고 공감 능력이 뛰어난 진로 상담사입니다. 당신의 역할은 경력 경로, 구직 활동, 또는 전문성 개발에 대한 조언을 구하는 개인들에게 안내와 지원, 그리고 정보를 제공하는 것입니다. 당신의 전문성을 활용하여 제공된 입력을 바탕으로 맞춤형 조언을 제공하세요.한국어로 답변해 주세요.", # instruction
        "커리어 관련하여 당신과 상담을 하고 싶습니다.", # input
        "", # output - leave this blank for generation!
    )
], return_tensors = "pt").to("cuda")

outputs = model.generate(**inputs, max_new_tokens = 64, use_cache = True)
tokenizer.batch_decode(outputs)
# alpaca_prompt = Copied from above
FastLanguageModel.for_inference(model) # Enable native 2x faster inference
inputs = tokenizer(
[
    alpaca_prompt.format(
        "재취업을 준비하는 50대분들에게 조언을 해주세요.", # instruction
        "", # input
        "", # output - leave this blank for generation!
    )
], return_tensors = "pt").to("cuda")

from transformers import TextStreamer
text_streamer = TextStreamer(tokenizer)
_ = model.generate(**inputs, streamer = text_streamer, max_new_tokens = 128)
모델 저장하기
model.save_pretrained_gguf("model", tokenizer, quantization_method ="f16")
# Save to 8bit Q8_0
if False: model.save_pretrained_gguf("model", tokenizer,)
# Remember to go to https://huggingface.co/settings/tokens for a token!
# And change hf to your username!
if False: model.push_to_hub_gguf("PAUL1122/model", tokenizer, token = "")

# Save to 16bit GGUF
if False: model.save_pretrained_gguf("model", tokenizer, quantization_method = "f16")
if False: model.push_to_hub_gguf("PAUL1122/model", tokenizer, quantization_method = "f16", token = "")

# Save to q4_k_m GGUF
if False: model.save_pretrained_gguf("model", tokenizer, quantization_method = "q4_k_m")
if False: model.push_to_hub_gguf("PAUL1122/model", tokenizer, quantization_method = "q4_k_m", token = "")

if False:
    model.push_to_hub_gguf(
        "shimseonjo/model", # 본인 허깅페이스 프로필 이름을 입력
        tokenizer,
        quantization_method = "q8_0",
        token = "hf_***************************", # 허깅페이스 토큰을 가져와서 넣어줌  https://huggingface.co/settings/tokens
    )
커스텀 모델 로컬에 등록
1. Modelfile 파일 생성
FROM ./unsloth.F16.gguf
2. 모델 만들기
ollama create example -f Modelfile
3. 모델 실행
ollama run example
프롬프트 사용자 지정
ollama pull llama3.2
FROM llama3.2

# set the temperature to 1 [higher is more creative, lower is more coherent]
PARAMETER temperature 1

# set the system message
SYSTEM """
You are Mario from Super Mario Bros. Answer as Mario, the assistant, only.
"""
Open WebUI
docker desktop 설치
1. docker desktop

2. 운영체제에 맞는 프로그램 다운로드

3. 다운로드 받은 프로그램 실행


4. 설치 후 close and restart 클릭

5. 재부팅 후 Accept 클릭

6. Finish

7. Skip

8. 설치 완료

open WebUI 설치
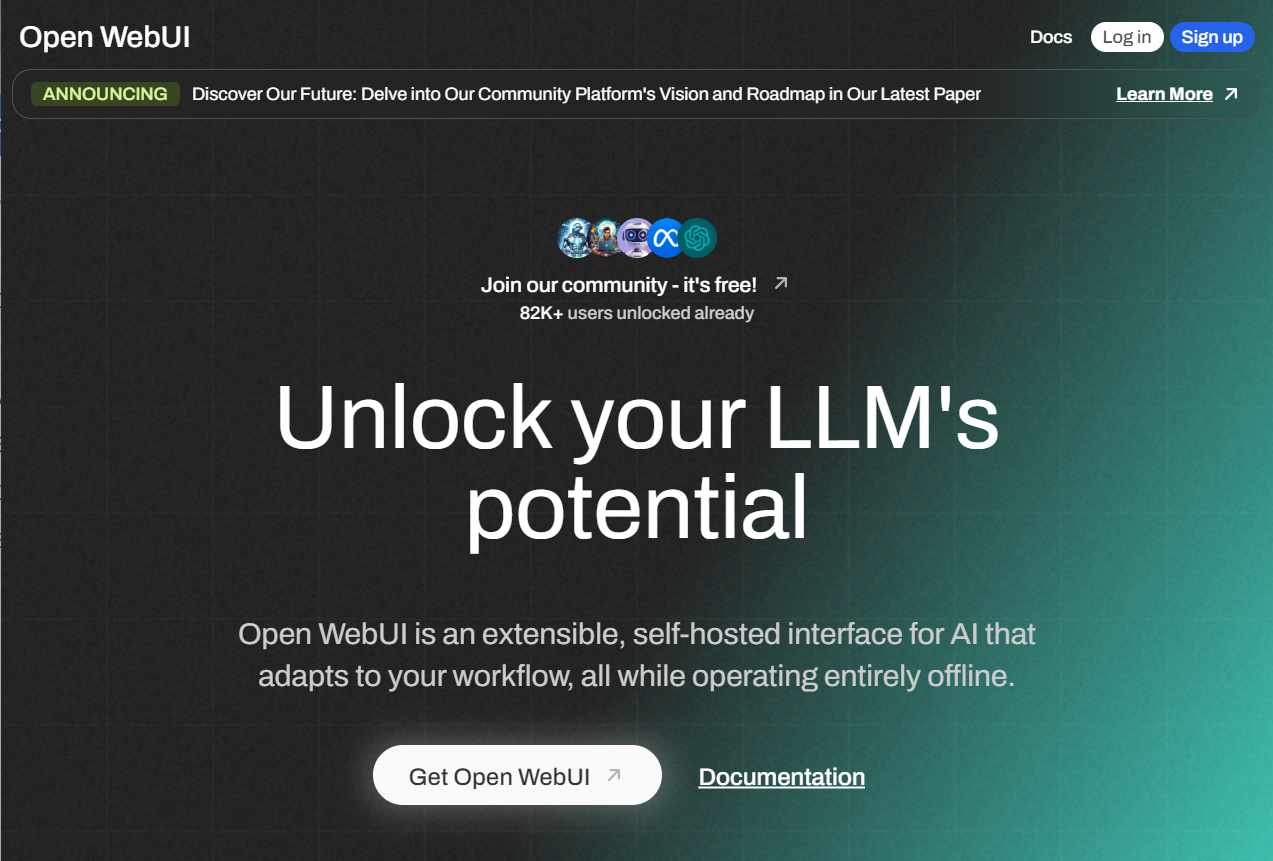
1. open WebUI 사이트로 이동
2. Doc 에서 설치 명령어 복사

3. 명령프롬프트에서 실행
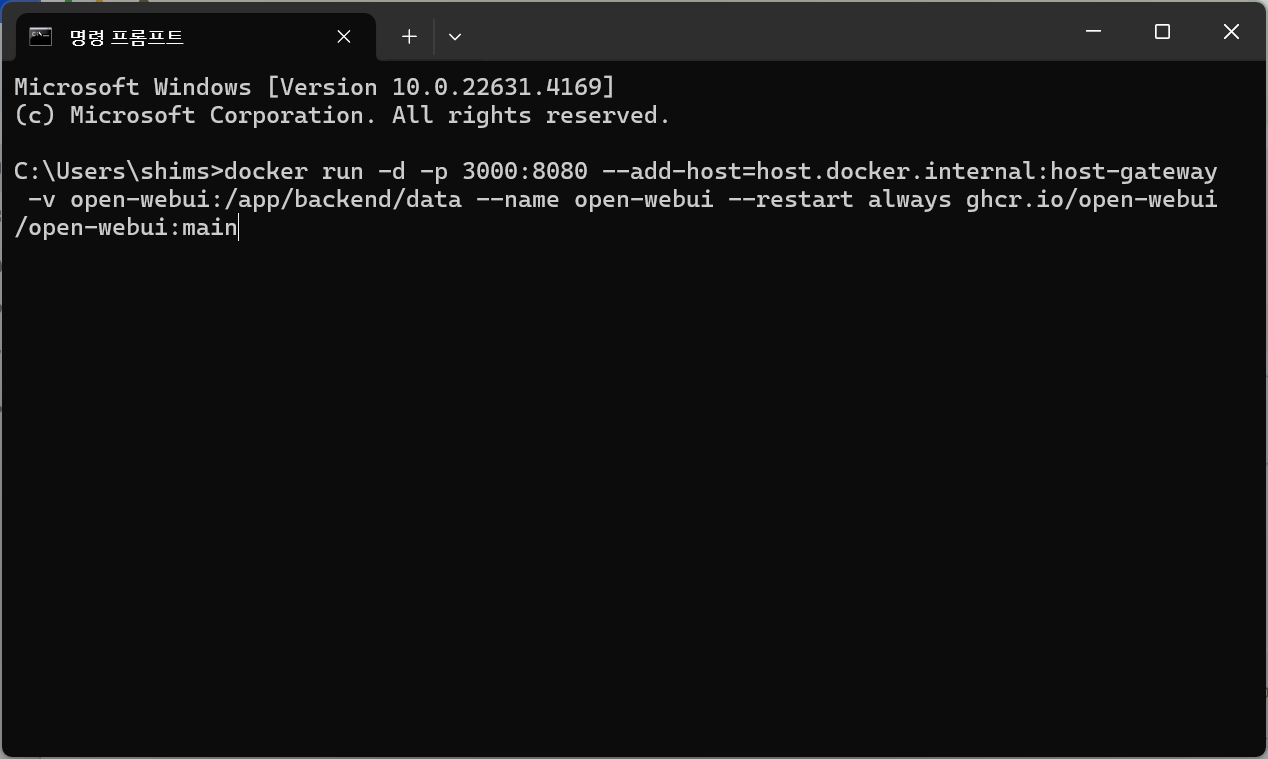
4. 설치 진행

5. docker desktop에서 열기

6. 웹브라우저가 실행되면 가입 클릭

7. 이름, 이메일, 비밀번호 입력후 계정만들기 버튼 클릭

8. 새로운 기능 창 닫기

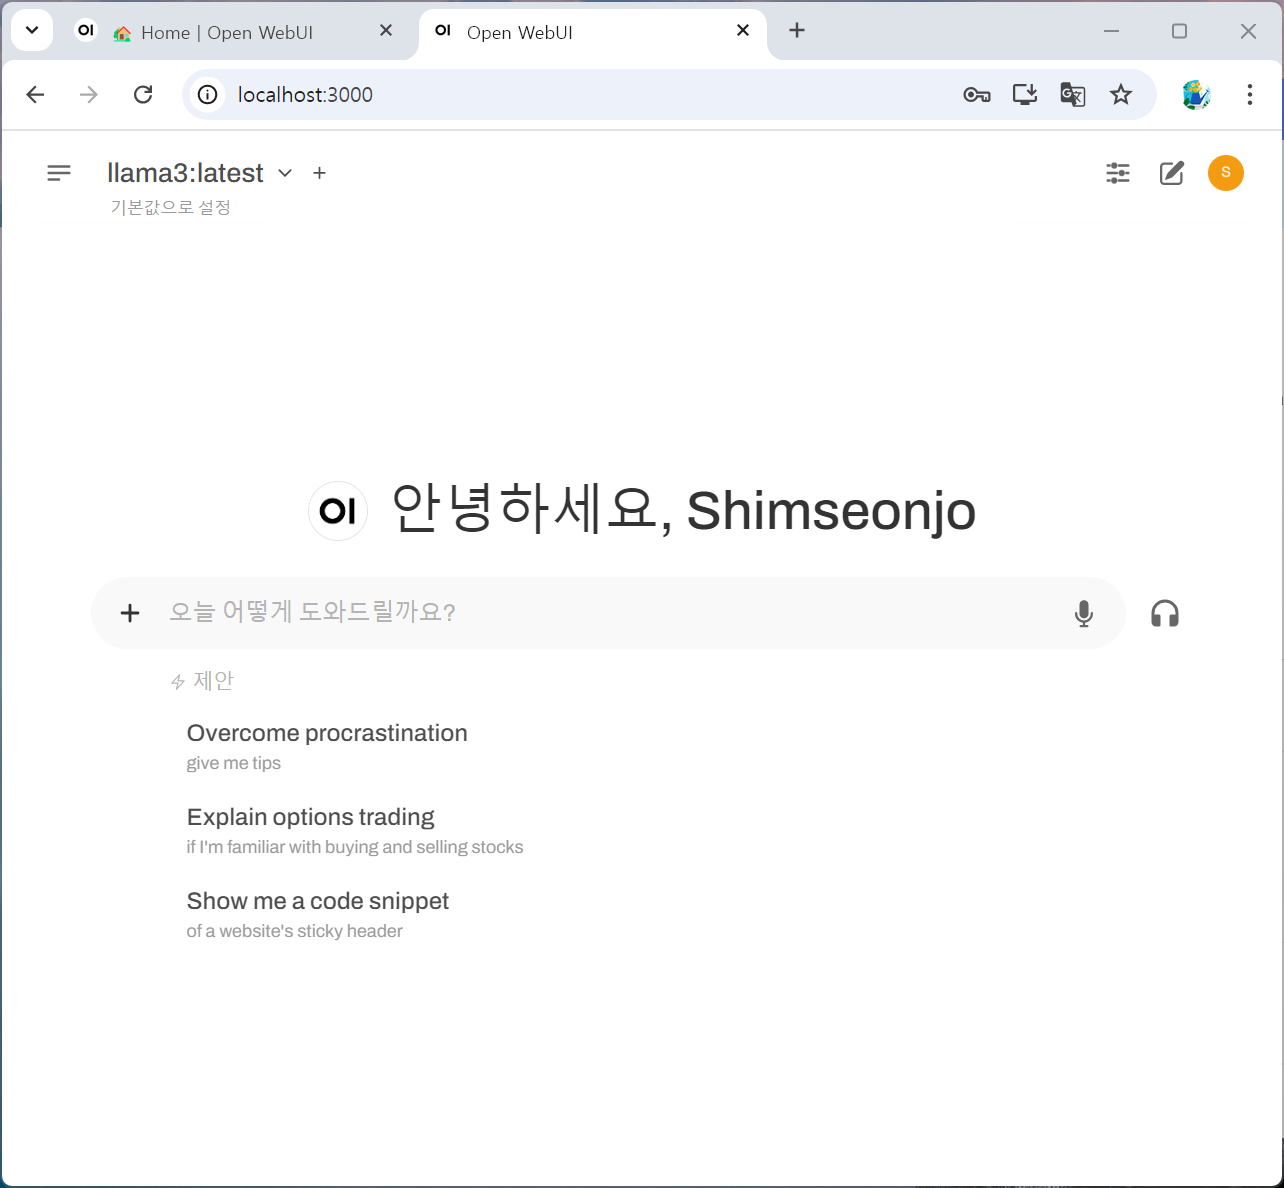
9. 모델 선택

10. 질문 입력
FlowiseAI
1. 필요한 모델 다운로드
ollama list
ollama run llama3.2:3b
/bye
ollama pull nomic-embed-text
2. FlowiseAI 설치
1) GITHUB CLONE
git clone https://github.com/FlowiseAI/Flowise.git
2) DOCKER 폴더로 이동
3) .ENV.EXAMPLE 파일을 .ENV 로 복사
PORT=3030
FLOWISE_USERNAME=user
FLOWISE_PASSWORD=1234
4) DOCKER-COMPOSE.YML 수정
# ports 항목에 11434 포트 포워딩 추가
        ports:
            - '${PORT}:${PORT}'
            - 11434:11434
5) DOCKER COMPOSE로 빌드 및 실행
서비스 시작
docker-compose up -d
서비스 종료
docker-compose stop
3. FlowiseAI 사용하기
1) LOCALHOST:3030 으로 접속

2) DOCUMENT STORE 클릭

3) ADD NEW 클릭하고 NAME 입력하고 ADD 버튼 클릭

4) 생성된 DOCUMENT STORE 클릭

5) ADD DOCUMENT LOADER 버튼 클릭

6) 문서의 종류에 따라서 선택 후 등록

7) UPSET CONFIG 버튼 클릭

8) SELECT EMBEDDINGS 클릭

9) OLLAMA EMBEDDINGS 선택

10) SELECT VECTOR STORE 클릭 후 FAISS 선택, 항목 입력 후 UPSET 버튼 클릭

11) TEST RETRIEVAL 버튼 클릭후 테스트, SAVE CONFIG 버튼 클릭

12) CHATFLOWS 선택 후, ADD NEW 버튼 클릭

13) 작성


주택 청약 FAQ 챗봇

1. 환경설정
requirements.txt
streamlit
langchain
faiss-cpu
openai
pymupdf
langchain-openai
langchain-community
pip install -r requirements.txt
2. 코드 작성
파일명 : .env
OPENAI_API_KEY=OPENAI_API_KEY
파일명 : chatbot_ollama.py
## streamlit 관련 모듈 불러오기
import streamlit as st
from streamlit.runtime.uploaded_file_manager import UploadedFile

## LLM 모델
from langchain_community.llms import Ollama
from langchain_community.embeddings import OllamaEmbeddings
# from langchain_openai import ChatOpenAI, OpenAIEmbeddings

from langchain_core.documents.base import Document
from langchain.text_splitter import RecursiveCharacterTextSplitter
from langchain_community.vectorstores import FAISS
from langchain.prompts import PromptTemplate
from langchain_core.runnables import Runnable
from langchain.schema.output_parser import StrOutputParser
from langchain_community.document_loaders import PyMuPDFLoader
from typing import List
import os
import fitz  # PyMuPDF
import re

## 환경변수 불러오기
from dotenv import load_dotenv,dotenv_values
load_dotenv()

# Ollama 서버 URL
ollama_url = "http://127.0.0.1:11434"  # 로컬에서 실행 중인 서버의 URL과 포트

############################### 1단계 : PDF 문서를 벡터DB에 저장하는 함수들 ##########################

## 1: 임시폴더에 파일 저장
def save_uploadedfile(uploadedfile: UploadedFile) -> str :
    temp_dir = "PDF_임시폴더"
    if not os.path.exists(temp_dir):
        os.makedirs(temp_dir)
    file_path = os.path.join(temp_dir, uploadedfile.name)
    with open(file_path, "wb") as f:
        f.write(uploadedfile.read())
    return file_path

## 2: 저장된 PDF 파일을 Document로 변환
def pdf_to_documents(pdf_path:str) -> List[Document]:
    documents = []
    loader = PyMuPDFLoader(pdf_path)
    doc = loader.load()
    for d in doc:
        d.metadata['file_path'] = pdf_path
    documents.extend(doc)
    return documents

## 3: Document를 더 작은 document로 변환
def chunk_documents(documents: List[Document]) -> List[Document]:
    text_splitter = RecursiveCharacterTextSplitter(chunk_size=800, chunk_overlap=100)
    return text_splitter.split_documents(documents)

## 4: Document를 벡터DB로 저장
def save_to_vector_store(documents: List[Document]) -> None:
    # embeddings = OpenAIEmbeddings(model="text-embedding-3-small")
    embeddings = OllamaEmbeddings( model="nomic-embed-text",base_url=ollama_url)
    vector_store = FAISS.from_documents(documents, embedding=embeddings)
    vector_store.save_local("faiss_index")


############################### 2단계 : RAG 기능 구현과 관련된 함수들 ##########################


## 사용자 질문에 대한 RAG 처리
@st.cache_data
def process_question(user_question):

    # embeddings = OpenAIEmbeddings(model="text-embedding-3-small")
    embeddings = OllamaEmbeddings( model="nomic-embed-text",base_url=ollama_url)

    ## 벡터 DB 호출
    new_db = FAISS.load_local("faiss_index", embeddings, allow_dangerous_deserialization=True)

    ## 관련 문서 3개를 호출하는 Retriever 생성
    retriever = new_db.as_retriever(search_kwargs={"k": 3})
    ## 사용자 질문을 기반으로 관련문서 3개 검색
    retrieve_docs : List[Document] = retriever.invoke(user_question)

    ## RAG 체인 선언
    chain = get_rag_chain()
    ## 질문과 문맥을 넣어서 체인 결과 호출
    response = chain.invoke({"question": user_question, "context": retrieve_docs})

    return response, retrieve_docs


def get_rag_chain() -> Runnable:
    template = """
    다음의 컨텍스트를 활용해서 질문에 답변해줘
    - 질문에 대한 응답을 해줘
    - 간결하게 5줄 이내로 해줘
    - 곧바로 응답결과를 말해줘

    컨텍스트 : {context}

    질문: {question}

    응답:"""

    custom_rag_prompt = PromptTemplate.from_template(template)

    # model = ChatOpenAI(model="gpt-4o-mini")
    model = Ollama(model="llama3.1:latest", base_url=ollama_url)

    return custom_rag_prompt | model | StrOutputParser()


############################### 3단계 : 응답결과와 문서를 함께 보도록 도와주는 함수 ##########################
@st.cache_data(show_spinner=False)
def convert_pdf_to_images(pdf_path: str, dpi: int = 250) -> List[str]:
    doc = fitz.open(pdf_path)  # 문서 열기
    image_paths = []

    # 이미지 저장용 폴더 생성
    output_folder = "PDF_이미지"
    if not os.path.exists(output_folder):
        os.makedirs(output_folder)

    for page_num in range(len(doc)):  #  각 페이지를 순회
        page = doc.load_page(page_num)  # 페이지 로드

        zoom = dpi / 72  # 72이 디폴트 DPI
        mat = fitz.Matrix(zoom, zoom)
        pix = page.get_pixmap(matrix=mat) # type: ignore

        image_path = os.path.join(output_folder, f"page_{page_num + 1}.png")  # 페이지 이미지 저장 page_1.png, page_2.png, etc.
        pix.save(image_path)  # PNG 형태로 저장
        image_paths.append(image_path)  # 경로를 저장

    return image_paths

def display_pdf_page(image_path: str, page_number: int) -> None:
    image_bytes = open(image_path, "rb").read()  # 파일에서 이미지 인식
    st.image(image_bytes, caption=f"Page {page_number}", output_format="PNG", width=600)


def natural_sort_key(s):
    return [int(text) if text.isdigit() else text for text in re.split(r'(\d+)', s)]

def main():
    st.set_page_config("청약 FAQ 챗봇", layout="wide")

    left_column, right_column = st.columns([1, 1])
    with left_column:
        st.header("청약 FAQ 챗봇")

        pdf_doc = st.file_uploader("PDF Uploader", type="pdf")
        button =  st.button("PDF 업로드하기")
        if pdf_doc and button:
            with st.spinner("PDF문서 저장중"):
                pdf_path = save_uploadedfile(pdf_doc)
                pdf_document = pdf_to_documents(pdf_path)  #
                smaller_documents = chunk_documents(pdf_document)
                save_to_vector_store(smaller_documents)
            # (3단계) PDF를 이미지로 변환해서 세션 상태로 임시 저장
            with st.spinner("PDF 페이지를 이미지로 변환중"):
                images = convert_pdf_to_images(pdf_path)
                st.session_state.images = images

        user_question = st.text_input("PDF 문서에 대해서 질문해 주세요",
                                        placeholder="무순위 청약 시에도 부부 중복신청이 가능한가요?")

        if user_question:
            response, context = process_question(user_question)
            st.write(response)
            for document in context:
                with st.expander("관련 문서"):
                    st.write(document.page_content)
                    file_path = document.metadata.get('source', '')
                    page_number = document.metadata.get('page', 0) + 1
                    button_key = f"link_{file_path}_{page_number}"
                    reference_button = st.button(f"🔎 {os.path.basename(file_path)} pg.{page_number}", key=button_key)
                    if reference_button:
                        st.session_state.page_number = str(page_number)

    with right_column:
        # page_number 호출
        page_number = st.session_state.get('page_number')
        if page_number:
            page_number = int(page_number)
            image_folder = "pdf_이미지"
            images = sorted(os.listdir(image_folder), key=natural_sort_key)
            print(images)
            image_paths = [os.path.join(image_folder, image) for image in images]
            print(page_number)
            print(image_paths[page_number - 1])
            display_pdf_page(image_paths[page_number - 1], page_number)


if __name__ == "__main__":
    main()
3. 실행
streamlit run chatbot_ollama.py
4. FAISS 데이터 확인
파일명 : faiss_upload_viewer.py
import streamlit as st
import pandas as pd
import numpy as np
from langchain_community.vectorstores import FAISS
from langchain_community.embeddings import OpenAIEmbeddings
from langchain_community.embeddings import OllamaEmbeddings
import tempfile
import os

# Set the page configuration (optional)
st.set_page_config(page_title="LangChain FAISS 색인 내용", layout="wide")

st.title("LangChain FAISS 색인 내용")

ollama_url = "http://127.0.0.1:11434"
# Add a file uploader for the individual FAISS index files
uploaded_files = st.file_uploader(
    "'index.faiss'와 'index.pkl' 파일을 업로드하세요",
    type=["faiss", "pkl"],
    accept_multiple_files=True
)

if uploaded_files is not None and len(uploaded_files) > 0:
    # Create a temporary directory to save the uploaded files
    with tempfile.TemporaryDirectory() as tmpdirname:
        # Initialize variables to store the paths of the uploaded files
        index_faiss_path = None
        index_pkl_path = None

        # Process the uploaded files
        for uploaded_file in uploaded_files:
            # Save each file to the temporary directory
            file_path = os.path.join(tmpdirname, uploaded_file.name)
            with open(file_path, 'wb') as f:
                f.write(uploaded_file.getbuffer())

            # Identify the file based on its name
            if uploaded_file.name == 'index.faiss':
                index_faiss_path = file_path
            elif uploaded_file.name == 'index.pkl':
                index_pkl_path = file_path

        # Check if both required files have been uploaded
        if index_faiss_path is None or index_pkl_path is None:
            st.error("'index.faiss'와 'index.pkl' 파일을 모두 업로드해주세요.")
            st.stop()

        # Now, load the FAISS index from the temporary directory
        # Since the files are saved in tmpdirname, we can use that as the base path
        try:
            vectorstore = FAISS.load_local(
                tmpdirname,
                # embeddings=OpenAIEmbeddings(model="text-embedding-3-small"),
                embeddings = OllamaEmbeddings( model="nomic-embed-text",base_url=ollama_url),
                allow_dangerous_deserialization=True
            )
        except Exception as e:
            st.error(f"FAISS 색인 로드 실패: {e}")
            st.stop()

        # Proceed with processing and displaying the data
        # Get the total number of vectors
        n_vectors = vectorstore.index.ntotal

        # Initialize lists to hold data
        texts = []
        metadatas = []
        embeddings_str = []

        # Function to convert embeddings to string with ellipsis, showing only the first 100 numbers
        def embedding_to_str(embedding):
            truncated_embedding = embedding[:100]  # Take the first 100 numbers
            embedding_str = ", ".join("{:.3f}".format(num) for num in truncated_embedding)
            return "[{}...]".format(embedding_str)

        # Iterate over the indices
        for i in range(n_vectors):
            # Get the document ID
            doc_id = vectorstore.index_to_docstore_id[i]

            # Retrieve the document
            doc = vectorstore.docstore.search(doc_id)

            # Append text and metadata
            texts.append(doc.page_content)
            metadatas.append(doc.metadata)

            # Reconstruct the embedding vector
            embedding_vector = vectorstore.index.reconstruct(i)

            # Convert embedding to string with ellipsis
            embeddings_str.append(embedding_to_str(embedding_vector))

        # Create the DataFrame
        df = pd.DataFrame({
            'text': texts,
            'metadata': metadatas,
            'embeddings': embeddings_str
        })

        # Function to convert DataFrame to HTML with code blocks in 'metadata' column
        def df_to_html_with_code(df):
            html = '''
            <html>
            <head>
                <style>
                    table {
                        width: 100%;
                        border-collapse: collapse;
                        table-layout: fixed;
                        word-wrap: break-word;
                    }
                    th, td {
                        text-align: left;
                        vertical-align: top;
                        padding: 8px;
                        border-bottom: 1px solid #ddd;
                        word-wrap: break-word;
                    }
                    th {
                        background-color: #f2f2f2;
                    }
                    pre {
                        background-color: #f0f0f0;
                        padding: 8px;
                        margin: 0;
                        white-space: pre-wrap; /* Wrap long lines */
                        word-wrap: break-word; /* Break long words */
                        font-size: 0.9em;
                    }
                    code {
                        font-family: Consolas, 'Courier New', monospace;
                    }
                    .cell-content {
                        max-height: 200px;
                        overflow: auto;
                    }
                </style>
            </head>
            <body>
                <table>
            '''
            # Add table header
            html += '<tr>'
            for column in df.columns:
                html += f'<th>{column}</th>'
            html += '</tr>'
            # Add table rows
            for _, row in df.iterrows():
                html += '<tr>'
                for column in df.columns:
                    cell_value = row[column]
                    if column == 'metadata':
                        # Convert metadata to JSON string with indentation
                        import json
                        metadata_str = json.dumps(cell_value, indent=2, ensure_ascii=False)
                        # Wrap in code block
                        cell_html = f'''
                        <div class="cell-content">
                            <pre><code>{metadata_str}</code></pre>
                        </div>
                        '''
                    else:
                        cell_html = f'''
                        <div class="cell-content">
                            {cell_value}
                        </div>
                        '''
                    html += f'<td>{cell_html}</td>'
                html += '</tr>'
            html += '''
                </table>
            </body>
            </html>
            '''
            return html

        # Convert DataFrame to HTML
        html_table = df_to_html_with_code(df)

        # Display the HTML table using st.components.v1.html()
        st.components.v1.html(html_table, height=800, scrolling=True)
    # Temporary directory and its contents are cleaned up here
else:
    st.info("FAISS 색인 내용을 보려면 'index.faiss'와 'index.pkl' 파일을 모두 업로드해주세요.")